

Yes, you can make soft, healthy dog treats with just four simple ingredients.
These peanut butter and applesauce dog treats are easy to prepare, budget-friendly, and made with wholesome ingredients you likely already have at home. They’re perfect for training, rewarding good behavior, or adding a little variety to your dog’s snack routine.
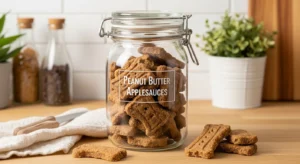
No preservatives. No artificial flavors. Just simple, dog-safe ingredients baked into crunchy, tail-wagging treats.
Why Peanut Butter and Applesauce Work So Well for Dogs
This combination isn’t just tasty. It also supports digestion and coat health.
Benefits of Peanut Butter for Dogs
-
Source of protein
-
Contains healthy fats
-
Supports skin and coat health
-
Naturally flavorful
Always use unsweetened peanut butter without xylitol. Xylitol is toxic to dogs.
Benefits of Unsweetened Applesauce
-
Gentle on digestion
-
Adds natural sweetness
-
Contains fiber
-
Low in fat
Together, they create a balanced homemade dog treat with great texture.
Ingredients for Peanut Butter and Applesauce Dog Treats
Main Ingredients
-
2 cups whole wheat flour (or oat flour for a gluten-free option)
-
½ cup natural peanut butter (xylitol-free)
-
1 cup unsweetened applesauce
-
1 egg
-
1 teaspoon baking powder (optional)
Ingredient Notes and Substitutions
-
Swap whole wheat flour for oat flour if your dog has wheat sensitivity.
-
Skip baking powder if you prefer denser treats.
-
If dough feels dry, add 1 tablespoon water at a time.
How to Make Peanut Butter and Applesauce Dog Treats
Step 1: Preheat the Oven
Preheat your oven to 350°F (175°C).
Line a baking sheet with parchment paper.
Step 2: Mix Dry Ingredients
In a large bowl combine:
-
Flour
-
Baking powder (if using)
Whisk to distribute evenly.
Step 3: Add Wet Ingredients
Add:
-
Peanut butter
-
Applesauce
-
Egg

Mix until a thick dough forms.
Use your hands if needed. The dough should be soft but not sticky.
If too sticky → add 1 tablespoon flour
If too dry → add 1 teaspoon water
Step 4: Roll the Dough
Lightly flour your work surface.
Roll the dough to about ¼-inch thickness.
Even thickness helps the treats bake evenly.
Step 5: Cut the Treats
Use cookie cutters to shape the treats.
Popular options include:
-
Bone shapes
-
Paw shapes
-
Simple squares
Re-roll scraps and repeat.
Step 6: Bake
Place treats 1 inch apart on the baking sheet.
Bake for 20–25 minutes until edges turn lightly golden.
For crunchier treats, bake 3–5 minutes longer.
Step 7: Cool Completely
Let the treats cool on the tray for 5 minutes.
Transfer them to a wire rack to cool completely.
Never store treats while warm.
Texture Options
Softer Treats
Bake for 18–20 minutes.
Crunchy Training Biscuits
Bake for 25–30 minutes, then turn the oven off and leave treats inside for 10 minutes to dry out.
Feeding Guidelines
Treats should make up no more than 10% of your dog’s daily calories.
General guide:
-
Small dogs: 1–2 small treats
-
Medium dogs: 2–3 treats
-
Large dogs: 3–4 treats
Adjust portions based on weight and activity level.
Storage Instructions
Room Temperature
Store in an airtight container for up to 7 days.
Refrigerator
Keeps fresh for up to 3 weeks.
Freezer
Freeze for up to 3 months.
Thaw before serving.
Troubleshooting
Dough Too Sticky
Add small amounts of flour gradually.
Treats Too Hard
Reduce baking time in the next batch.
Uneven Baking
Rotate the baking tray halfway through baking.
Treats Crumble
The dough may be too dry. Add a small amount of water next time.
Are These Safe for Puppies?
Yes, but in small amounts.
Introduce new treats slowly and monitor digestion.
Skip baking powder if making these for very young puppies.
Final Thoughts
These peanut butter and applesauce dog treats are simple, healthy, and easy to batch bake.
They’re affordable, customizable, and made with ingredients you already trust.
Sometimes the best treats are the simplest ones.